Application Notes
Scratch Mechanisms for Automobile Paint
|
Simultaneous measurement of topography and
tangential force during scratching can be a valuable tool for
investigating surface degradation mechanisms. In particular, it is
possible to differentiate between small-scale mechanical interlocking and
chemical interaction for a particular test probe and substrate
combination.
|
|
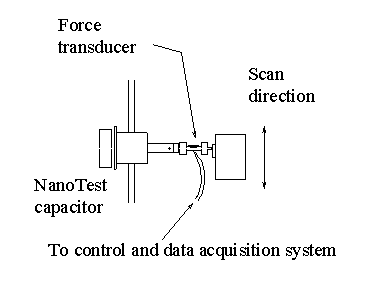
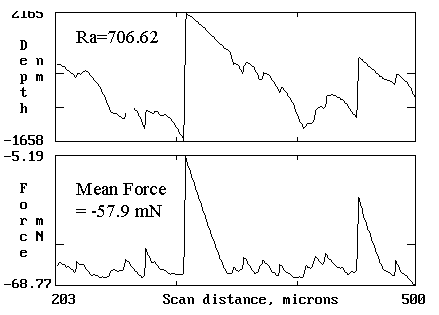
These results were obtained from a weathered automobile paint system consisting of a steel substrate, primer, metallic paint and clear laquer overcoat. The penetration depths employed mean that the results pertain to the overcoat layer specifically. In the NanoTest, tangential force is measured by means of a piezoresistive force transducer. This is placed immediately behind the test probe, which is used to determine topography variations in the usual way, i.e., by means of the pendulum capacitor, as illiustrated above. The plot on the left shows the simultaneous measurement of the tangential force on a test probe and the displacement of the probe as it moves over the paint surface at a constant speed and with a constant applied normal force. The probe was a 3-faceted pyramidal diamond, the normal force was 50mN, and the scanning speed was 5µm/s.
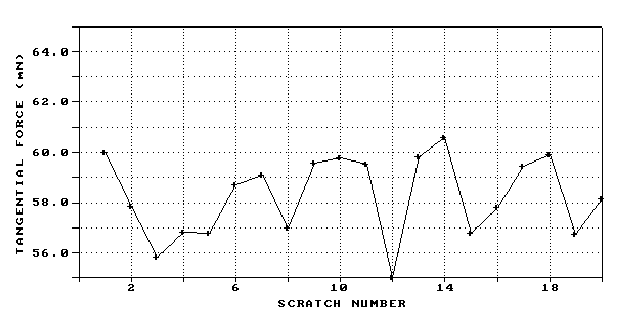
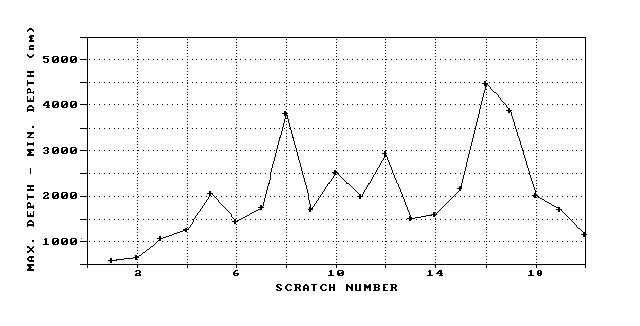
Maximum on-load depth change (below) and mean frictional force (above) measured for each of 20 scratches. A 25µm radius spherical diamond was used, the normal load was 200mN, the scratch length was 1mm, and the scanning speed was 10µm/s.
It can be seen that under these conditions periodic roughening and smoothing of the surface took place, i.e., a simple trend towards the production of larger peaks and valleys did not occur.
A direct relationship between tangential force and maximum displacement indicating mechanical interlocking as the mechanism responsible for scratching. Here, a sharp, pyramidal diamond was used, the normal load was 20mN, and the scan velocity was 5µm/s over a distance of 500µm |


